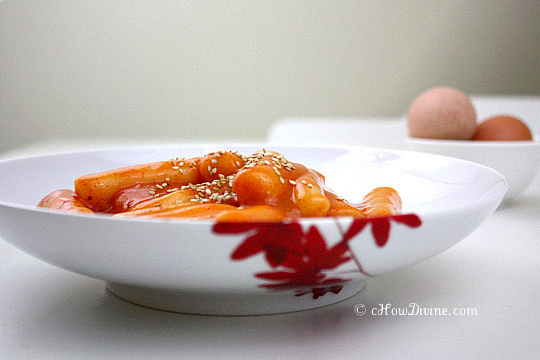
Ddukbokki is hands down my favorite street food. That’s saying a lot, considering the number of street foods available just in Korea.
When I was in fifth grade, my parents sent me and my brother to Korea to visit my grandparents. That was the last time I had totally authentic Korean street food. But I remember the taste of ddukbokki like it was yesterday. Since then, I had ddukbokki at many (some fancy) restaurants, but none compares to the simple, street-vendor-style ddukbokki I enjoyed so much as a little girl.
When you get ddukbokki from a street vendor in Korea, you simply receive cylindrical rice cakes cooked in spicy sauce – sometimes with fish cakes. Pay a little more, and you get a boiled egg along with the rice cakes. Unbelievably tasty! As much as I love and appreciate meats and vegetables, I like my ddukbokki simple and bare.
DDUKBOKKI RECIPE
Makes 4 servings
Ingredients
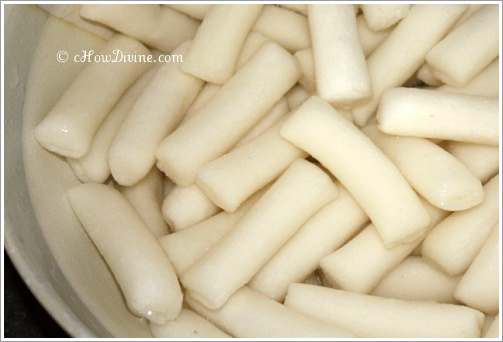
1 lb cylindrical rice cakes
3-4 heaping TB gochujang (Korean red chili pepper paste)
1 TB agave nectar or sugar
1 tsp gochugaru (Korean red chili pepper flakes)
2 cups anchovy-dashima stock/broth
boiled and peeled eggs: optional
Before You Cook: Anchovy-dashima stock makes up the base of the sauce for this dish. Although anchovy-dashima stock is preferrable – if you don’t have it on hand or you are a vegan – substitute it with vegetable stock. The taste won’t be the same, but it will be delicious nonetheless.
- Separate the rice cake into individual pieces and soak in cold water for 20+ minutes; this will allow the rice cakes (“dduk”) to absorb some water and become a bit softer (even if it doesn’t appear so).
- If you are including boiled eggs to this dish, boil them now so that they will still be warm when the ddukbokki is ready.
- In a large pan, pour 2 cups of anchovy-dashima stock. Bring it to a boil over medium heat.
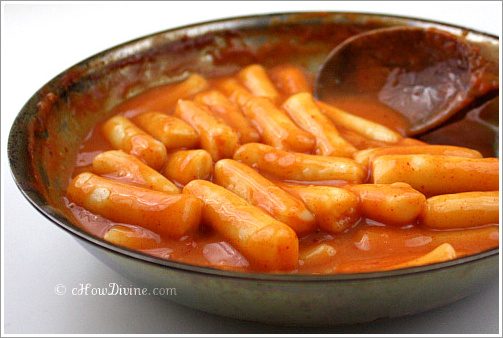
- Add the dduk to the stock and cook for about 3 minutes*, while stirring. Add 3-4 tbs of gochujang, 1 tbs of agave or sugar, and 1 tsp gochugaru. Stir to ensure that the seasoning is well dissolved into the stock. Lower the heat.
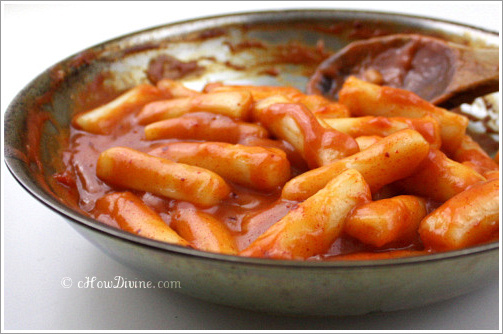
- To prevent the dduk from sticking to the pan, keep stirring until the dduk has softened and the sauce becomes thicker (5-8 minutes)*. The dduk should be soft, but still chewy. Keep in mind, the sauce will thicken further even after you remove the pan from heat due to the starch from dduk. So, don’t reduce down the sauce too much; because even if the sauce is a little bit waterier than you’d like, it will continue to thicken after it’s done cooking. If the sauce has thickened or reduced too much before the rice cakes have completely softened, add more stock or water.
- If you are using eggs, add the boiled and peeled eggs to the pan towards the end of cooking. Mix well, allowing the eggs to heat through. Remove from heat. Serve while it’s still hot. Dip the boiled eggs in the sauce with each bite. The taste is just heavenly!
* Note: Cooking time largely depends on the type of dduk being used. Frozen dduk – especially if it’s a bit old and, thus, drier – takes considerably longer to cook. I am using packaged frozen rice cakes. These are harder than fresh rice cakes, which is why I soak AND precook them before seasoning is added. If you are cooking with fresh (soft) rice cakes, you can skip both steps – the soaking AND the precooking for 3 minutes before seasoning is added.


I love DDUKBOKKI. It’s such a comforting, yummy street food. ^^
Among the first things I plan to do when I go back to Korea for a visit is to run to a ddukbokki vendor for a quick fix! And yes, it is so comforting.
This is interesting! I have never been to Korea but I have always been fascinated by their culture. I was amazed by the street food culture when I visited Asia (unfortunately we never got to visit Seoul…)
Sometimes eating is not about the flavor but the whole experience of it. I hope I can try this at home too…Thanks for sharing!
You are so welcome Anna! I hope you can make it to Seoul someday. My friends & I had to sneak out to get ddukbokki from a street vendor, because our parents & grandparents didn’t want us going to the marketplace by ourselves 🙂 It was that good!
I just love this dish!!!! I lived in Korea for nearly 3 years and this was my favorite street food. When I visit again a ddukbokki vendor is my first stop as well… Thank you so much for the recipe. ^^
You’re welcome Kristian! I hope you get a chance to try the recipe.
I really do miss the street food in Korea! 🙂
Ahh, ddukbokki, my favorite street food. You have no idea how many times I picked this up to eat when I went to Seoul. I swear I ate it at least four times from street vendors and I was only there for five days! So good. I’ll have to try your recipe and see if it brings back the delicious taste of Seoul.
I hope you like it. The anchovy-dashima stock is what really makes the difference. So don’t skip it! 🙂
Oh, so that’s how come every one else’s sauce is thinner than mine! We boil the dduk like noodles, drain, add a splash of sesame oil, and a heaping spoon of gochujahng and serve it plain. Will definitely have to try your stock version! Thanks 🙂
Hi Tiffany~ Give it a try with the stock. There is quite a difference in taste. I think you’ll like it! 🙂
Looks amazing! How would you go about adding pork belly or another meat to this?
Hi Esther! Thanks for the comment. It’s quite simple actually. Just saute the pork belly or beef first before adding the dduk (or tteok). You can also use marinated beef (bulgogi) or pork belly (spicy pork or jeyuk). I hope you enjoy it!